As a developer, a well working, solid keyboard is essential for my day-to-day. I recently learned of how many people now build their own keyboards and decided to give it a shot after seeing the wide range of possibilities that exist.
The following post described my experience in building the TADA68.
TADA68 Link to heading

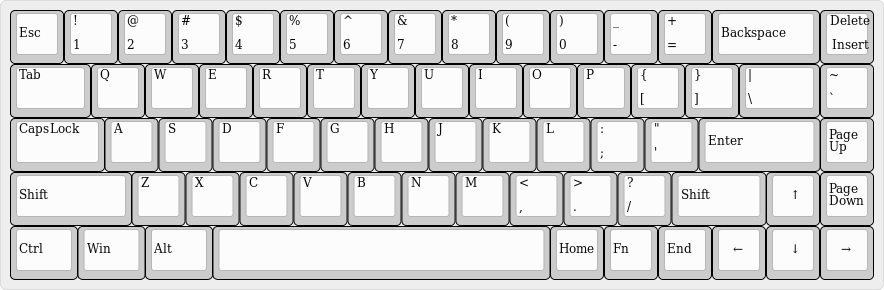
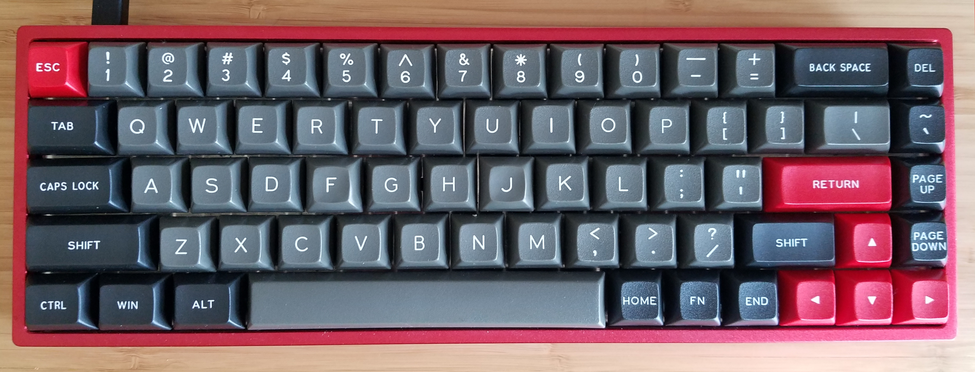
The TADA68 as the name suggests is a 68 key keyboard. This type of keyboard is tenkeyless and also removes the top row of function keys, while still maintaining the arrow keys and a few function keys. I prefer the tenkeyless setup to avoid having my arms too far away from a mouse when needed and find my own use of the number pad to be so little that having one is no longer justified. Here is a picture of the layout I am using, not the default one, from keyboard-layout-editor:
I purchased the TADA68 kit from KBDfans. I choose to purchased the aluminum red case over the standard plastic case after reviews demonstrated the solid structure; and cool colors. I am glad I did as he aluminum is incredible sturdy, is a wonderful base to build on top of and the red looks fantastic as well.
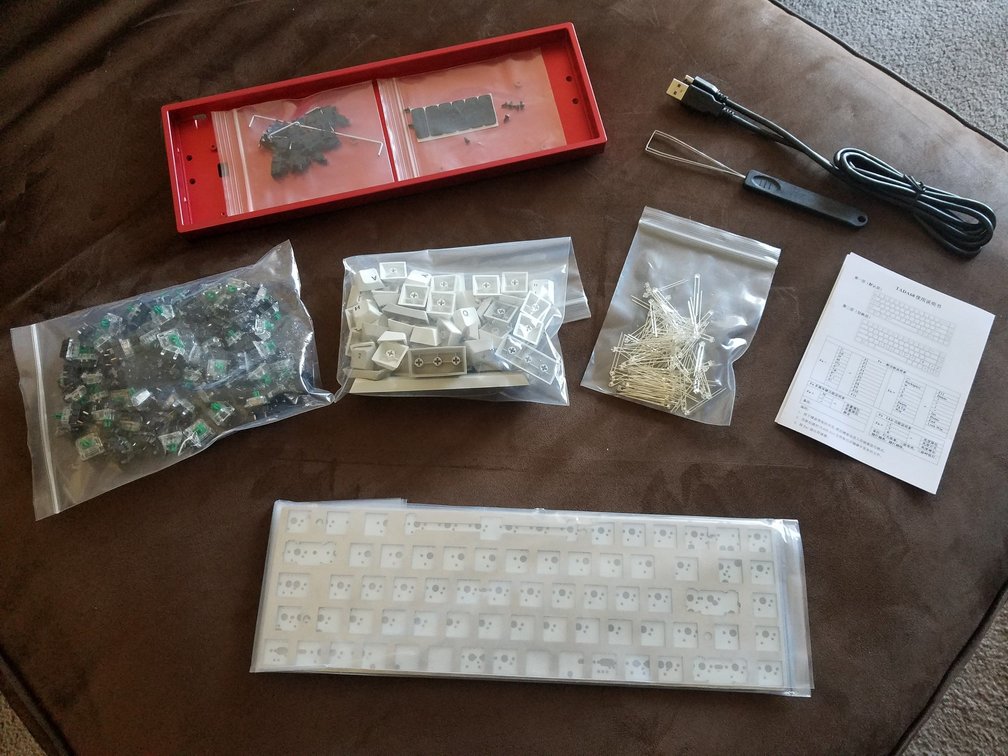
To build a complete keyboard I also picked up a set of Gateron Green keys and a pack of 100 white LEDs. I went with the clicky, heavy green keys after getting a key sampler and using browns for the past few years. I am also very happy I went clicky and heavier keys. I enjoy hearing the sound and the extra weight has not been too noticeable.
For my build, I also purchased a set of DSA Dolch keys from Pimp My Keyboard, whom I would highly recommend and gladly purchase from again. I wanted a darker set of keys than the standard light gray and I also really liked the bright red set of keys for the escape and arrow keys.
Assembly Link to heading
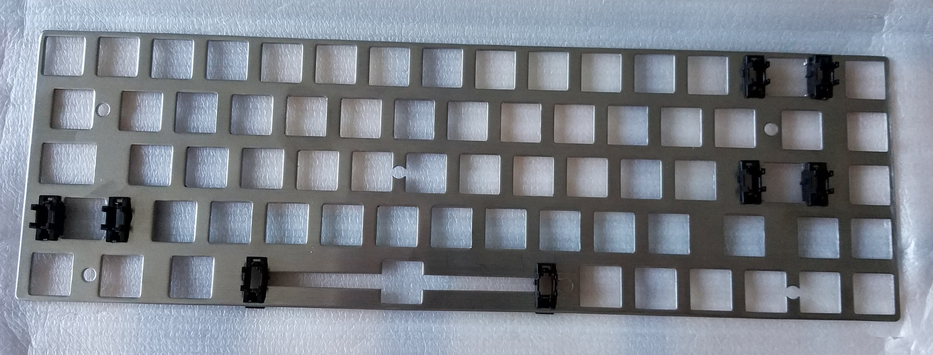
The first step of the assembly was to put together the metal bracket and the stabilizers for the larger keys. This actually felt like the hardest part of the entire process as the small black pieces were made of two different pieces that go together in a very specific way. I was unaware of how these go together until I did a bit of research.
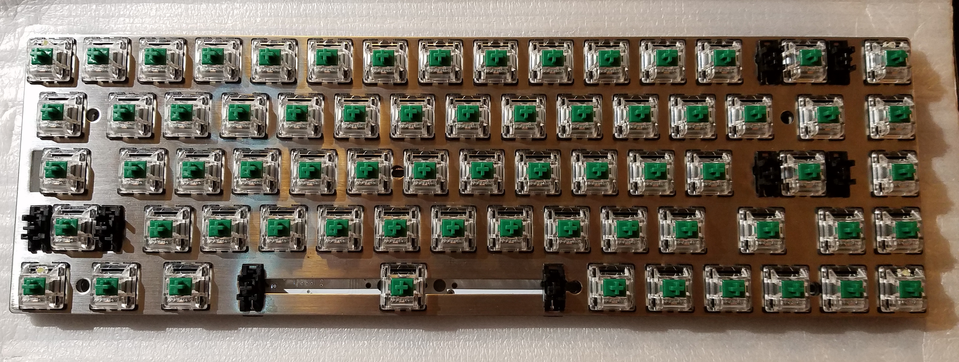
Next, I put together the bracket and the PCB and installed a few of the keys. Specifically I put the corner keys on to get everything mated together. I soldered those keys on and then proceeded to solder keys a row at a time.
Here is what all the keys looked like installed:
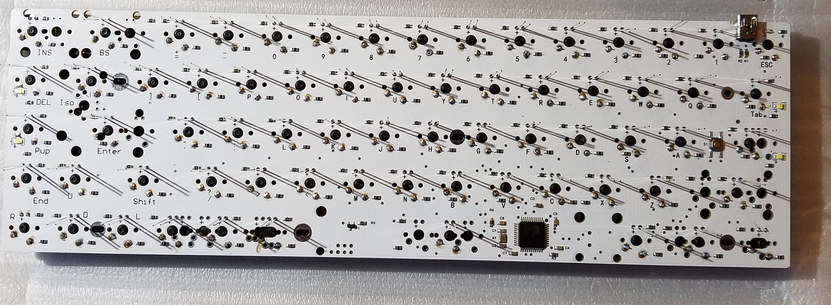
After the keys were installed I turned to installing the LEDs. Each LED is pulled through the key itself and through the PCB.
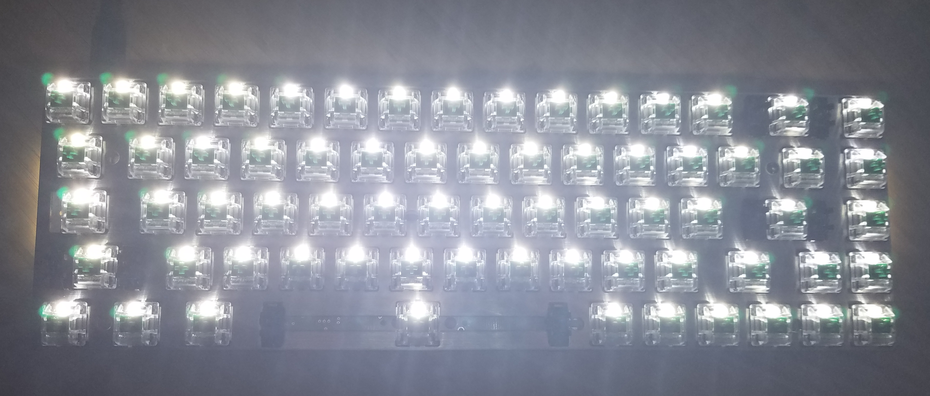
The moment of truth and everything lit up! I did find that I had one orange LED out of the batch I installed, so I had to remove that one and re-solder a new one.
The final step was to install the PCB into the chassis and start installing keycaps.
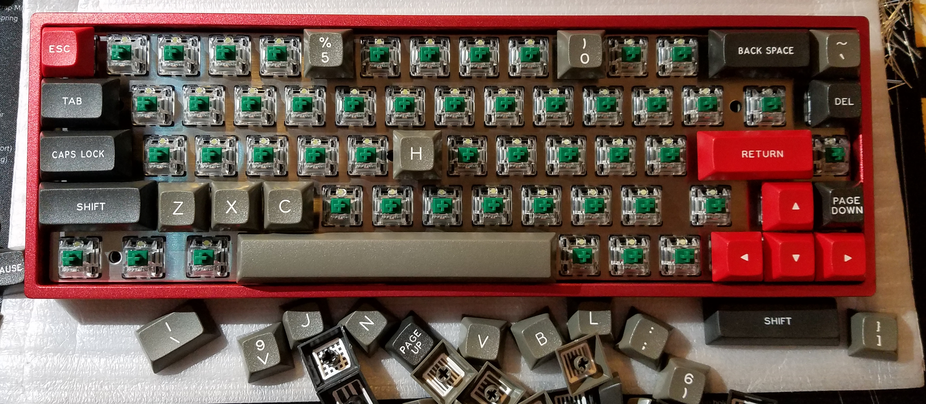
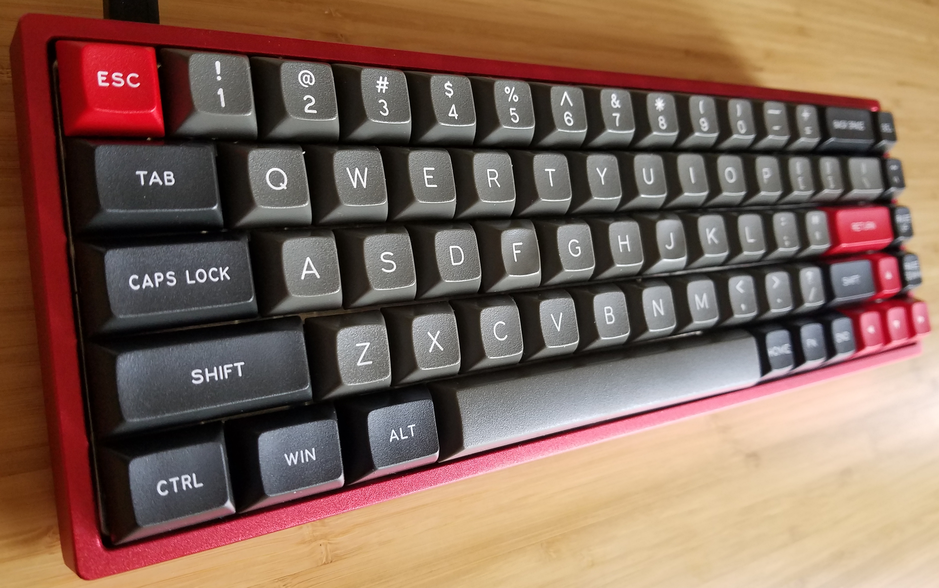
And here it is all done!
Testing Link to heading
Once assembly was complete I connected it to my system and ran through each key with a keyboard tester verifying each key worked as expected and that the LEDs could be turned on and off.
Programming Link to heading
The keyboard is fully programmable to allow changing each key. However, it requires going to a custom site that requires Flash. The process is fairly simple: click the key you want to change, select the new key, save the file. To upload requires pressing the button under the keyboard, the keyboard will appear as a device on your system, and you have to replace the current keymap file with the new keymap file you downloaded.
I used the above method since I had access to a Windows system with Flash and found it worked fairly smoothly. I did try to do the replacement of the file on my Ubuntu system and it did not work, leaving the keyboard nonfunctional.
There is also an open source method to flash the keyboard using the QMK Firmware, however I have not had a chance to attempt this method either.
Impression Link to heading
I really love my keyboard. It has been a joy to use, the sound is wonderful, and the typing experience is fabulous. I love the heavier aluminum case as the keyboard does not slide around at all due to the substation base.
However, this is was not a cheap endeavor: given this is only a keyboard I spent far more money than I thought I would, but it was worth it.